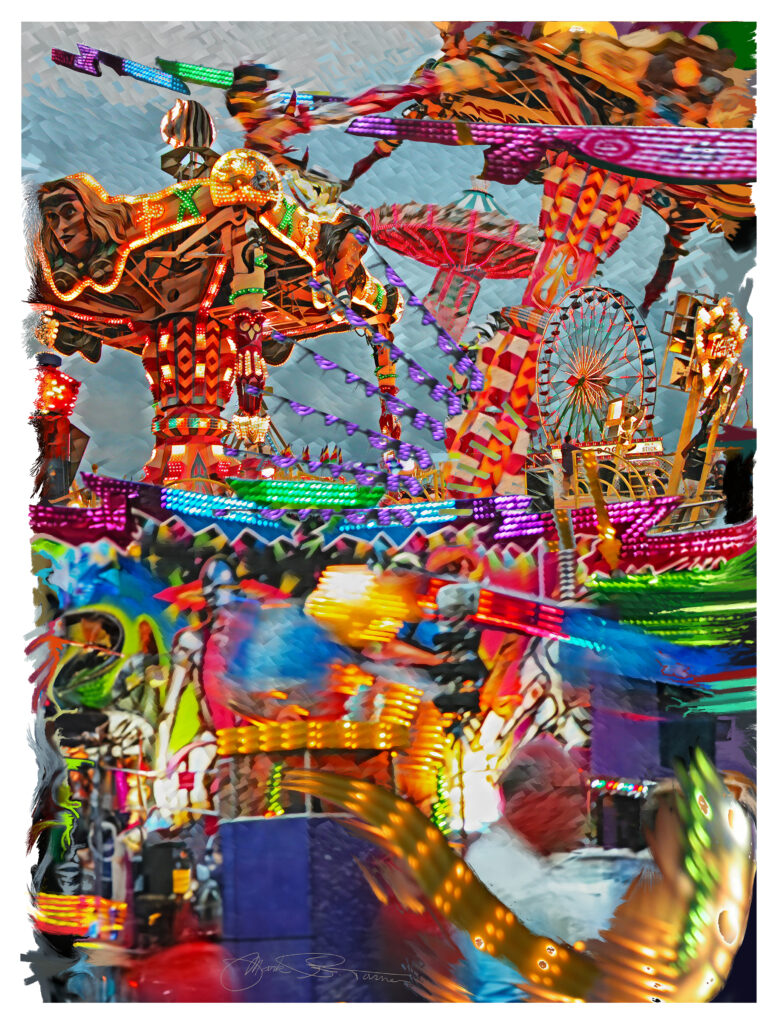
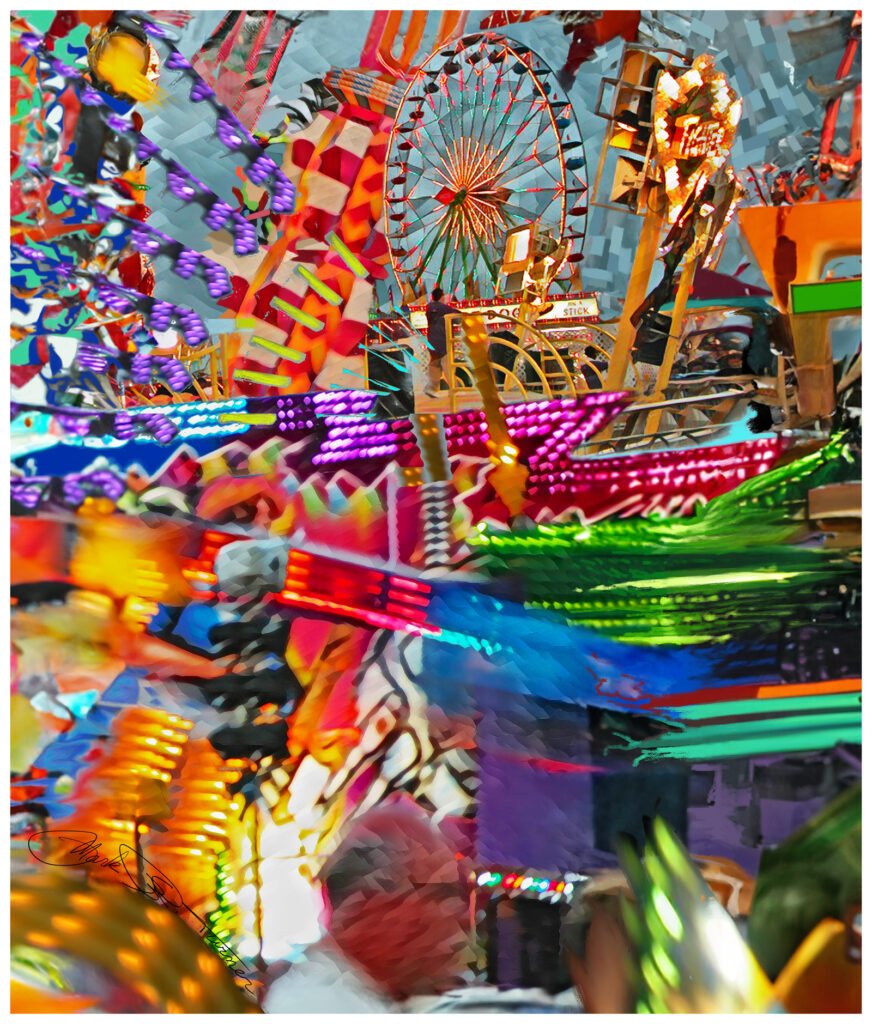
Some may be interested in how I created the digital paintings titled “Carni Abstract”, particularly Numbers 3 and 4. See Number 4 as the illustration to the blog “Tiny Lights Make Commotion”. View the art on apparel, accessories, cases, bags, and home decor at the shops linked to our Visual Art page.
Here is the process which I hope will be helpful to others creating their art.
Getting the Photos
- I accessed some photos framed with a Nikon CoolPix 5700 (a 5.2 pixel digital camera) of the Del Mar Fairgrounds, San Diego, at dusk, June 18, 2009. (Dimensions: 1024×768 pixels (3.413 x 2.56 inches, 300 px/inch).
- With the goal of a very large composition in mind, I selected three photos to open in Photoshop. In Image>Image Size I checked “Resample:” and selected “Bicubic Smoother (enlargement)” from the dropdown menu. I changed dimensions to current standards (i.e.: 4000×3000). Until recently this would have only magnified what was in the original, making the pixels appear bigger – what we call “pixelated” which is not a “normal” look. The Bicubic Smoother recalibrates the image to increase the pixels to the number needed for the enlargement, producing a new, large version of the small image.
Preparing the Images
I processed each photo in the following steps (always hitting “Control/S” after most major actions to SAVE all along the way):
- Under “Filter” I selected “Camera Raw Filter” and adjusted several of the many options to suit my artistic preferences. My plan was to make each original photo show as much as possible for the rest of the artistic process to make use of.
- Light – exposure, contrast, highlights, shadows, whites, blacks
- Color – temperature, tint, vibrance, saturation
- Detail – sharpening, noise reduction, color noise reduction
- Using the Crop tool (keystroke “c”) I pulled the frame out from the image instead of the usual inward cropping. Right-clicking within the expanded image, I chose “Generative Expand”. In the top navigation bar of the work area, I selected “Generative Expand” in the Fill box dropdown menu.
- You can choose to allow the system to generate its own AI content based on the original content to fill the expanded area, or you can specify with words what is your artistic preference. I chose to see what the system would generate, and it gave me three options to sample and compare. I ran the generate process two or three times to get more samples and chose what I thought I could work with when I would alter what AI gave me.
- In the layer panel I right-clicked the layer used for the generated content and chose “Rasterize Layer” in order to make it accessible for editing.
- With the rasterized layer highlighted, I merged the layer down to the original image by keystroke “Control/E”. Now the photo was one image again with the addition of the new content.
- Under Filter I selected “Neural Filters”. In the filter panel that appeared I turned on “Style Transfer” which offers several “Artist styles” and several “Image styles”. Lots of experimentation can be done here to see what you can use in your own composition. I ultimately chose an Image style and checked the “Preserve color” box. I adjusted strength, opacity, detail, brightness, blur, and saturation to suit my artistic plan.
Making the Collage
After processing each of the photos in the above steps, I made a collage out of them.
- I created a new Photoshop canvas in the dimensions needed for print reproductions (more than 6000×5000 pixels) and specified a transparent background. I copied each photo and pasted them as layers in the new canvas in the stacking order needed. I positioned and sized them into an arrangement to begin working with.
- Using the Lasso tool and Marquee tool I selected parts of the images, right clicked within the selection and chose “Layer via cut”, or “Layer via copy”. The cut-outs became new layers which I positioned, sized, and color adjusted.
- Using my Wacom Intuos Pro graphics tablet, I integrated the images with each other by hand painting on each image and on new layers arranged above and below the images.
- I carefully chose and sized brushes with natural properties such as rough edges (pastel, blending brushes, oil paint).
- I used the eye dropper tool to select colors from the images themselves so that the painting would be native to the prepared photos.
- I used the eraser tool as a painting brush to subtract places at various opacities.
- The blurring tool and smudge brushes blended edges and my handwork with the photos.
- After living with a composition for a while I keep examining it at 100% size and adjusting what I find close-up. I continually zoom out to “Fit to screen” and see if the composition is unifying as a whole.
- When I am satisfied that the composition has been taken far enough, I make a layer at the very top of the layer panel and sign it using the graphics tablet. I then go to File> “File info” and fill out the form which will be the meta data for the work including the copyright notice. (“©” is made by keystrokes “alt/0,1,6,9” and I type the year, “… Mark Robert Turner all rights reserved.”) This data travels from copy to copy and helps warn future viewers that the work is legally protected.
- I often make a white margin and a transparency margin on the final composition to help future framers avoid covering up the edge of the art.
- Click Image>”Canvas size”. With the expansion point set at the center, I increase the dimensions about a half-inch. Since I specified the background of this canvas as transparent, the margin will be transparent.
- Back in the workspace, add a layer at the bottom of the layer panel. Make sure the current selected color is white and use the Paint Bucket tool to fill this bottom layer with white. This makes the margin white but preserves the ability to turn it off and show the transparent margin.
- To make your final versions click File>”Save a copy” to render a “.jpg” with the white margin. Then turn off the bottom white layer and render a “.png” which will be the version to use without a white margin. These renderings merge all the layers into one flattened composition of reduced pixel size.